Fairing the planshape means making it nice and smooth to the shape you want prior to turning the rail, as mentioned before the board is built to a particular planshape from the start, so it's not possible to change it too much, Keep in mind that the rail should be a constant section as designed. don't try to taper the rail way into the board to thin the nose and tail so that it looks like a tapered foam board or you will stuff it up (i.e cut into the hollow part). The rail is really simple to do, and it works very well, so just go with it.
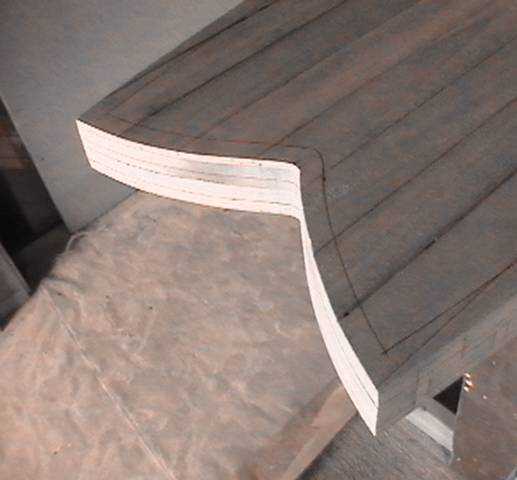
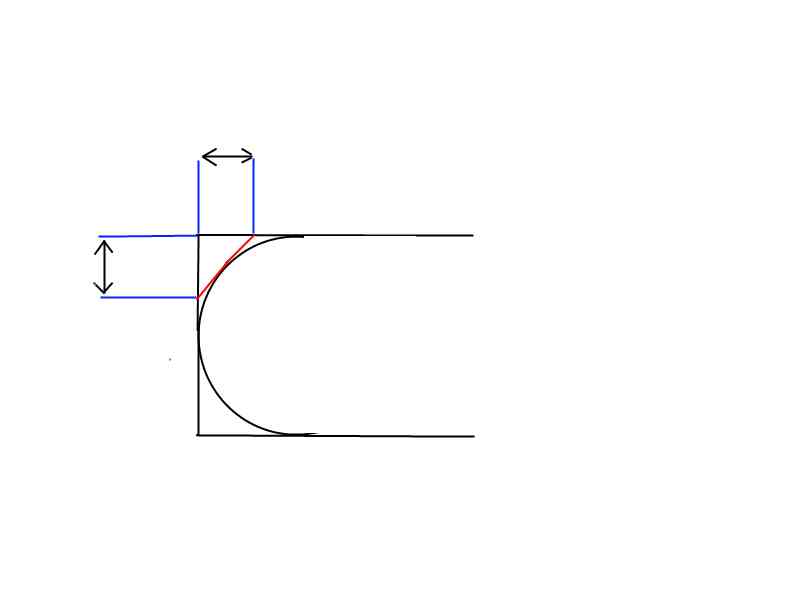
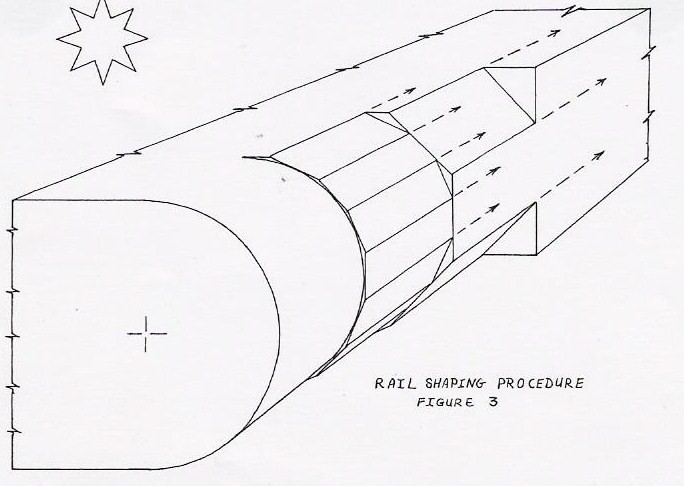
First step is to take the main 45 degree facets off the rail, these should be marked using a ballpoint pen or pencil taped on to a carpenters square. What you do to find the width of the markings for the facets is to make a drawing of the rail cross section like the attached drawing and photo, which shows the top of the rail. If you will be doing a 40/60 downrail, you need to make a smaller circle for the bottom part of the rail than for the top, the top circle radius is 60% of the thickness of the rail and the bottom one is 40%.
To remove the wood to make the whole facet all the way around the board, use a wood rasp ( not a surform), working carefully across the rail without breaking bits off at the edges. . . for example if you are doing the top of the rail draw the rasp down from the deck, rather than up, as upwards can split bits off the deck. Then go over the facet with 40 grit sandpaper and a sanding block until it's just right, lastly a fine rasp ( there are good ones with a semi circular cutting pattern, like rows of half moons which are ideal at this stage but not aboslutely necessary, they can be bought as just the rasp blade without a handle, and they bend a bit which is good).
Then proceed to the next facet.